How to Assemble the Perfect Fall Harvest Cheese Board
This easy and impressive Fall Harvest Cheese Board is perfect for parties, holidays, and get-togethers! Here are all of my tips and tricks for putting together the perfect appetizer.
This post was sponsored by Montchevre®. All opinions are my own. Thank you for supporting the brands that make Baked Ambrosia possible.
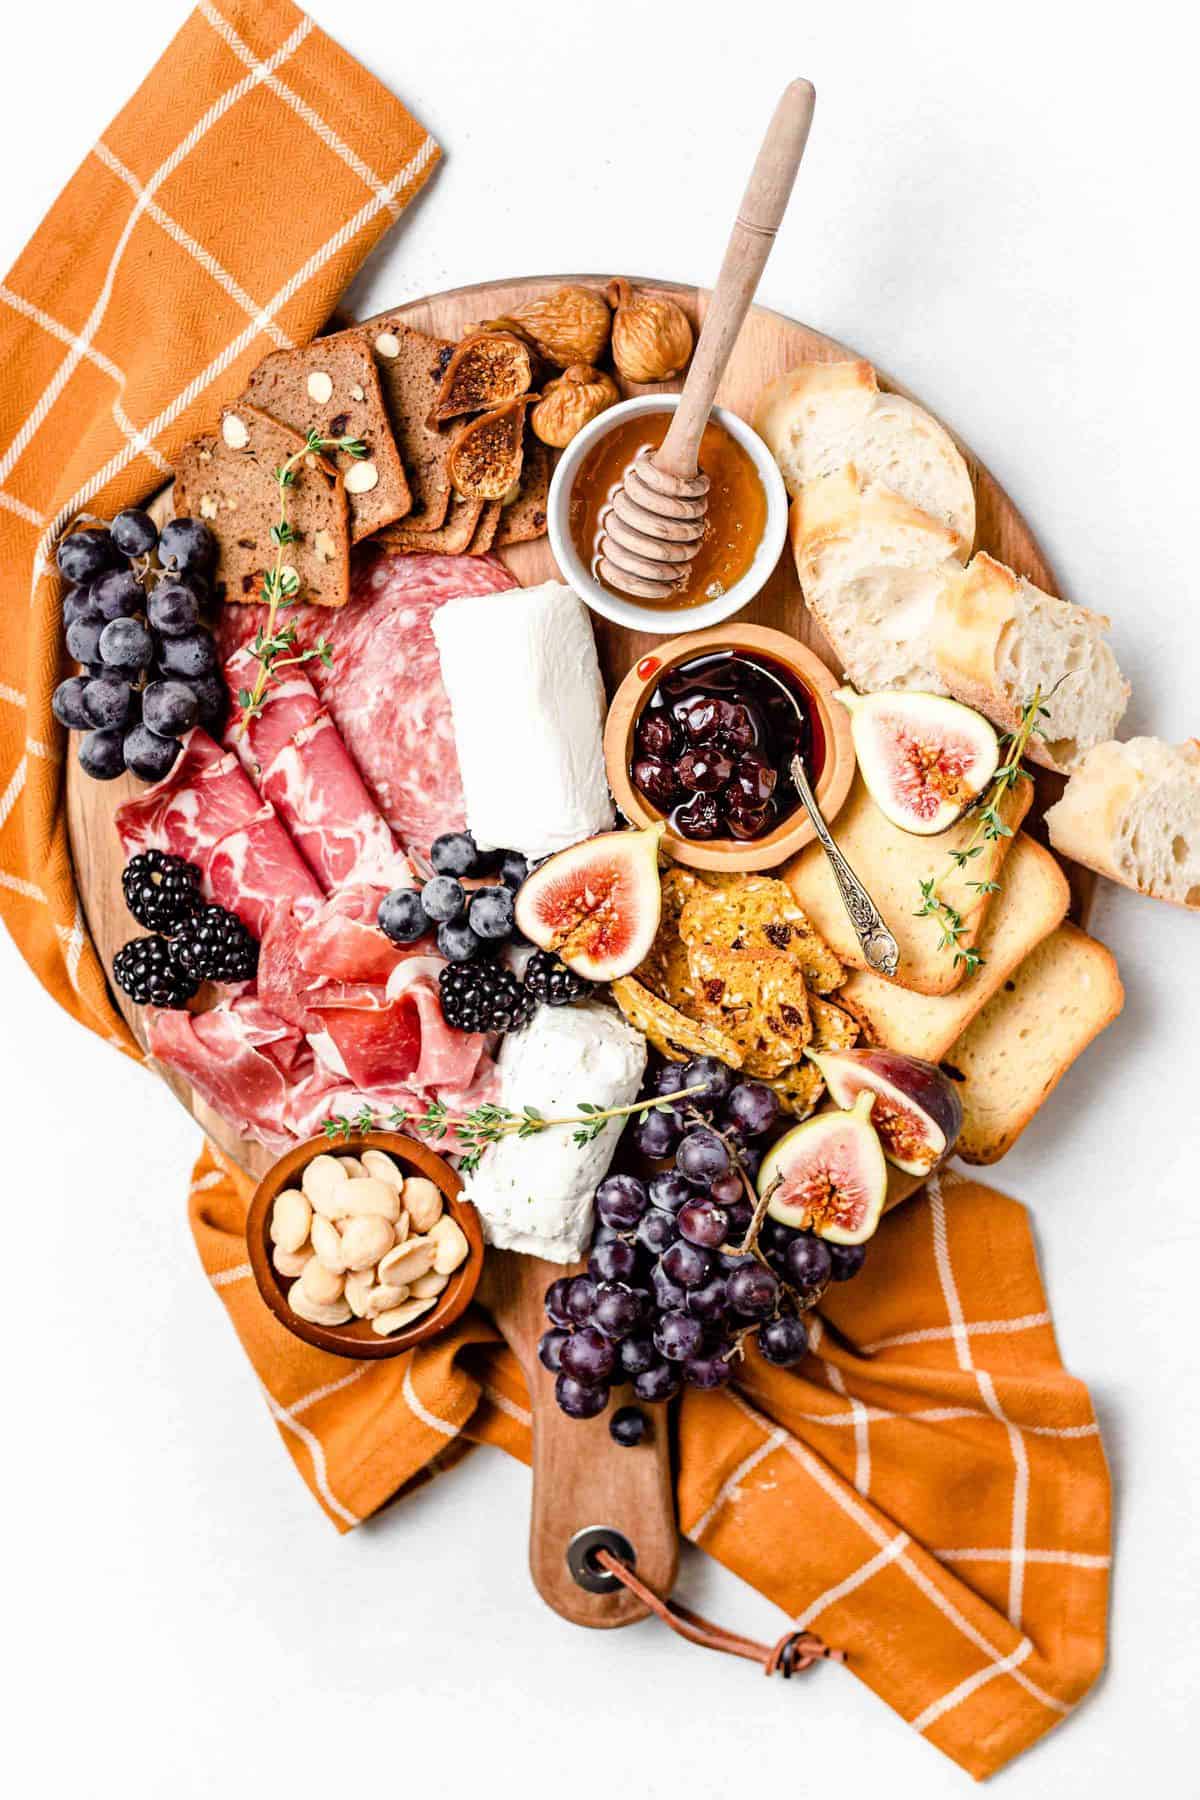
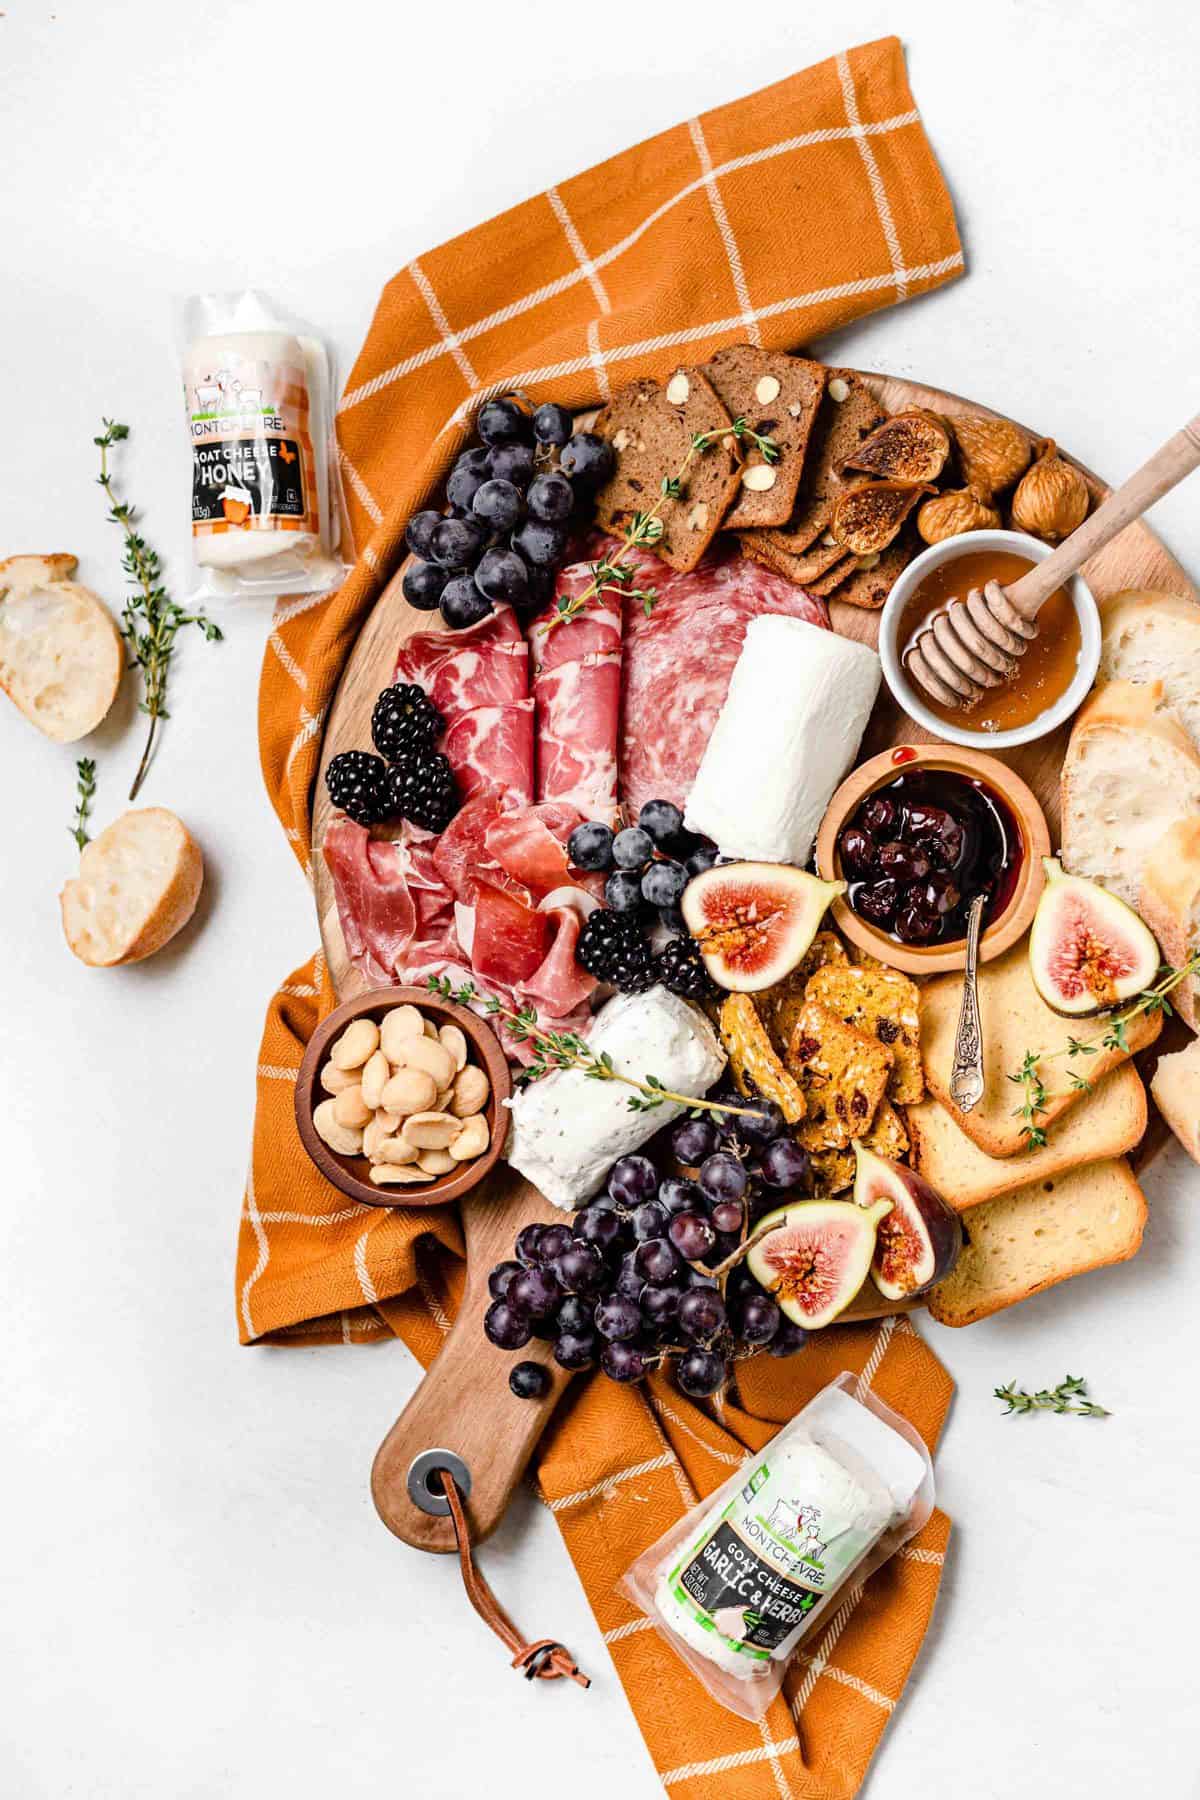
When it comes to stress-free entertaining, nothing is easier or more impressive than a cheese platter loaded with sweet and savory treats. Cheese boards are perfect for entertaining any time of the year. They are elegant spreads that change with the seasons. This Fall Harvest Cheese Board is loaded with seasonal flavors that your guests will love!
Sometimes simple foods truly are the best. This Fall Harvest Cheese Board is just that—simple, yet delicious. Many times, cheese platters become overwhelming with many different types of cheeses, meats, and fruits. To really appreciate the star of the show here, I like to choose a cheese and use a couple of different flavors or varieties of it. For my Fall Harvest Cheese Board, I used Montchevre® Goat Cheese Logs. They are creamy, tangy, and the perfect pairing to everything else on the platter. Visit Montchevre® to create your own virtual cheese board for a chance to win instantly!
Don’t be intimidated by creating an eye-catching cheese board. It only takes about 5 minutes to assemble and requires no cooking! This Fall Harvest Cheese Board is perfect for holiday celebrations, last-minute get-togethers, or for a date night.
WHAT YOU NEED FOR THE PERFECT CHEESE BOARD
Let’s go over everything you will need to assemble the perfect Fall Harvest Cheese Board. Using high-quality, seasonal ingredients is key to creating the perfect cheese board!
- Platter: I like to use a wood or marble platter to assemble my spread. The size depends on how many guests you are expecting. For 4-6 people, I like to use a 15-inch board.
- Small Bowls: A few small bowls arranged around the platter are great for smaller items, spreads, and seasonings. Plus, their shape and height adds a visually appealing element to the board.
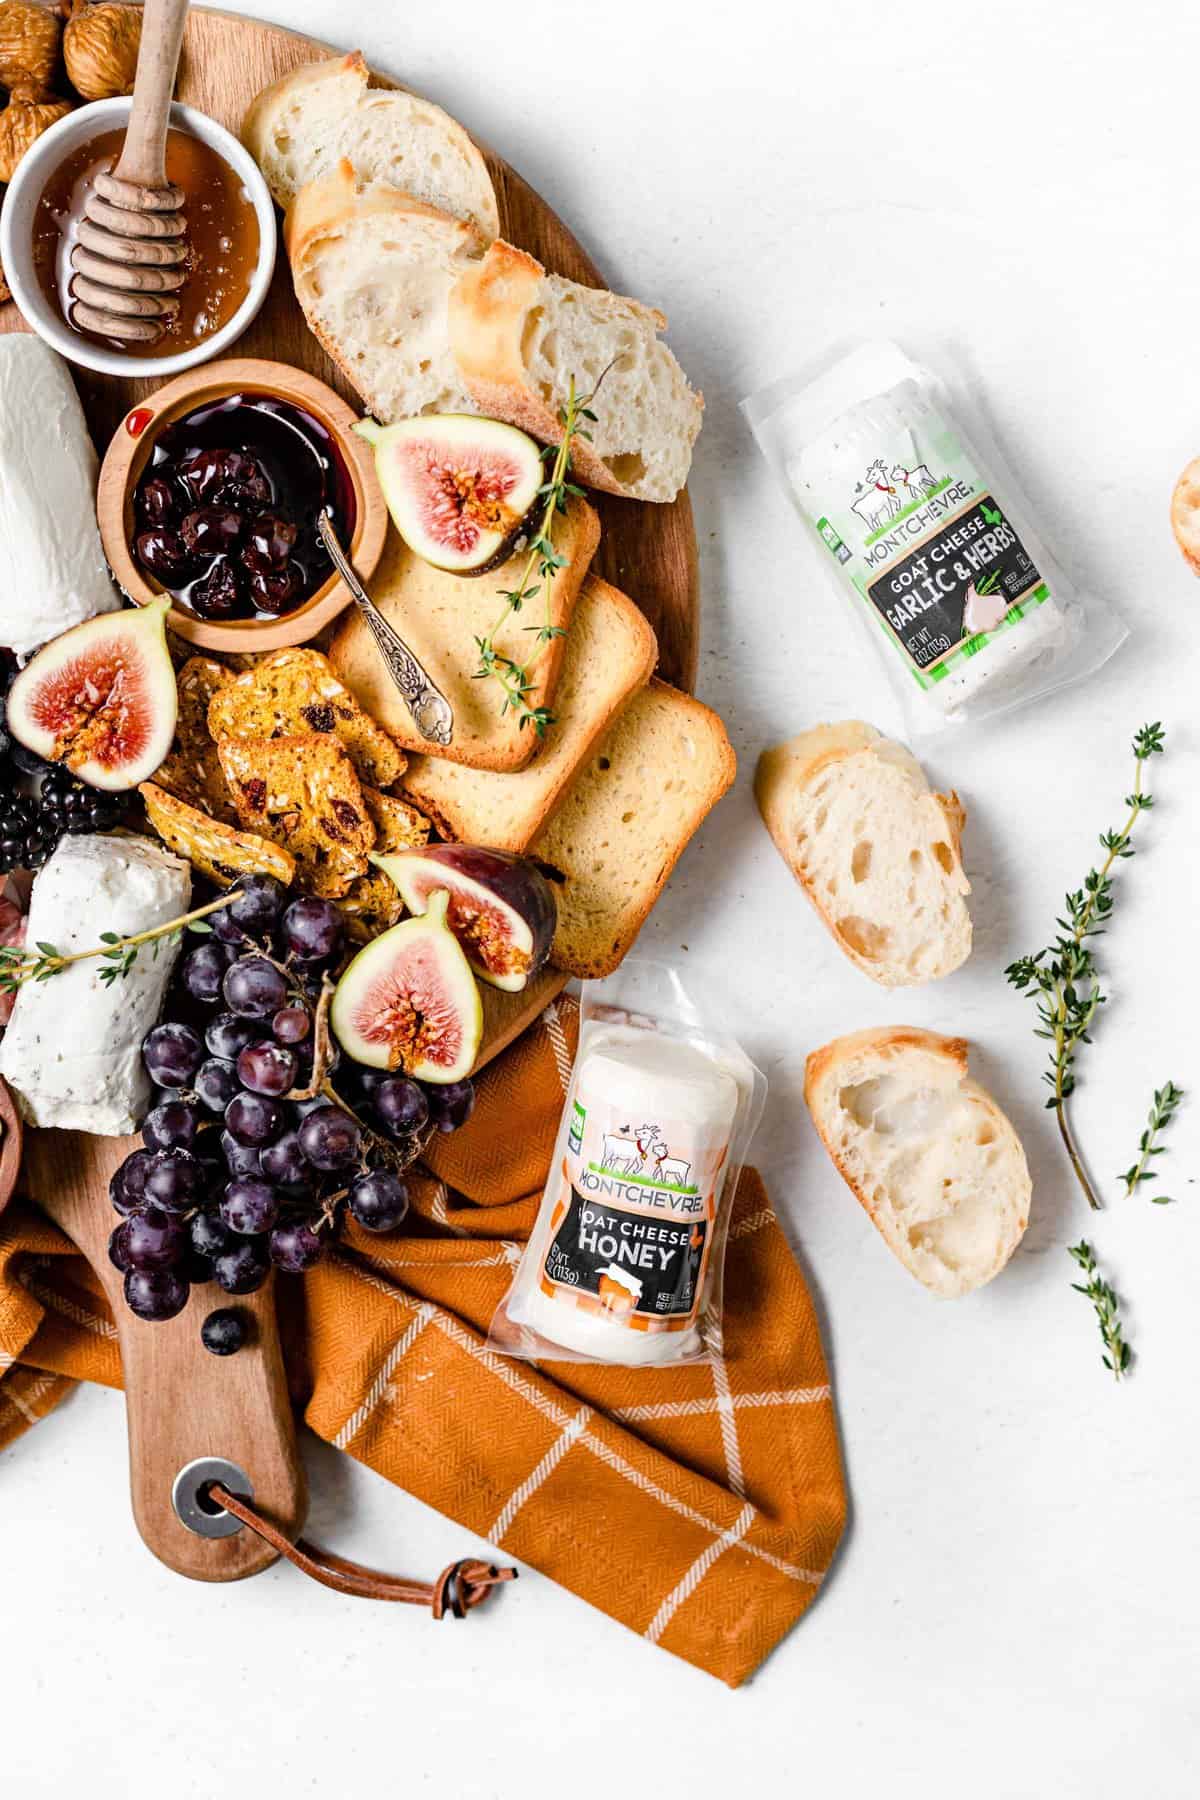
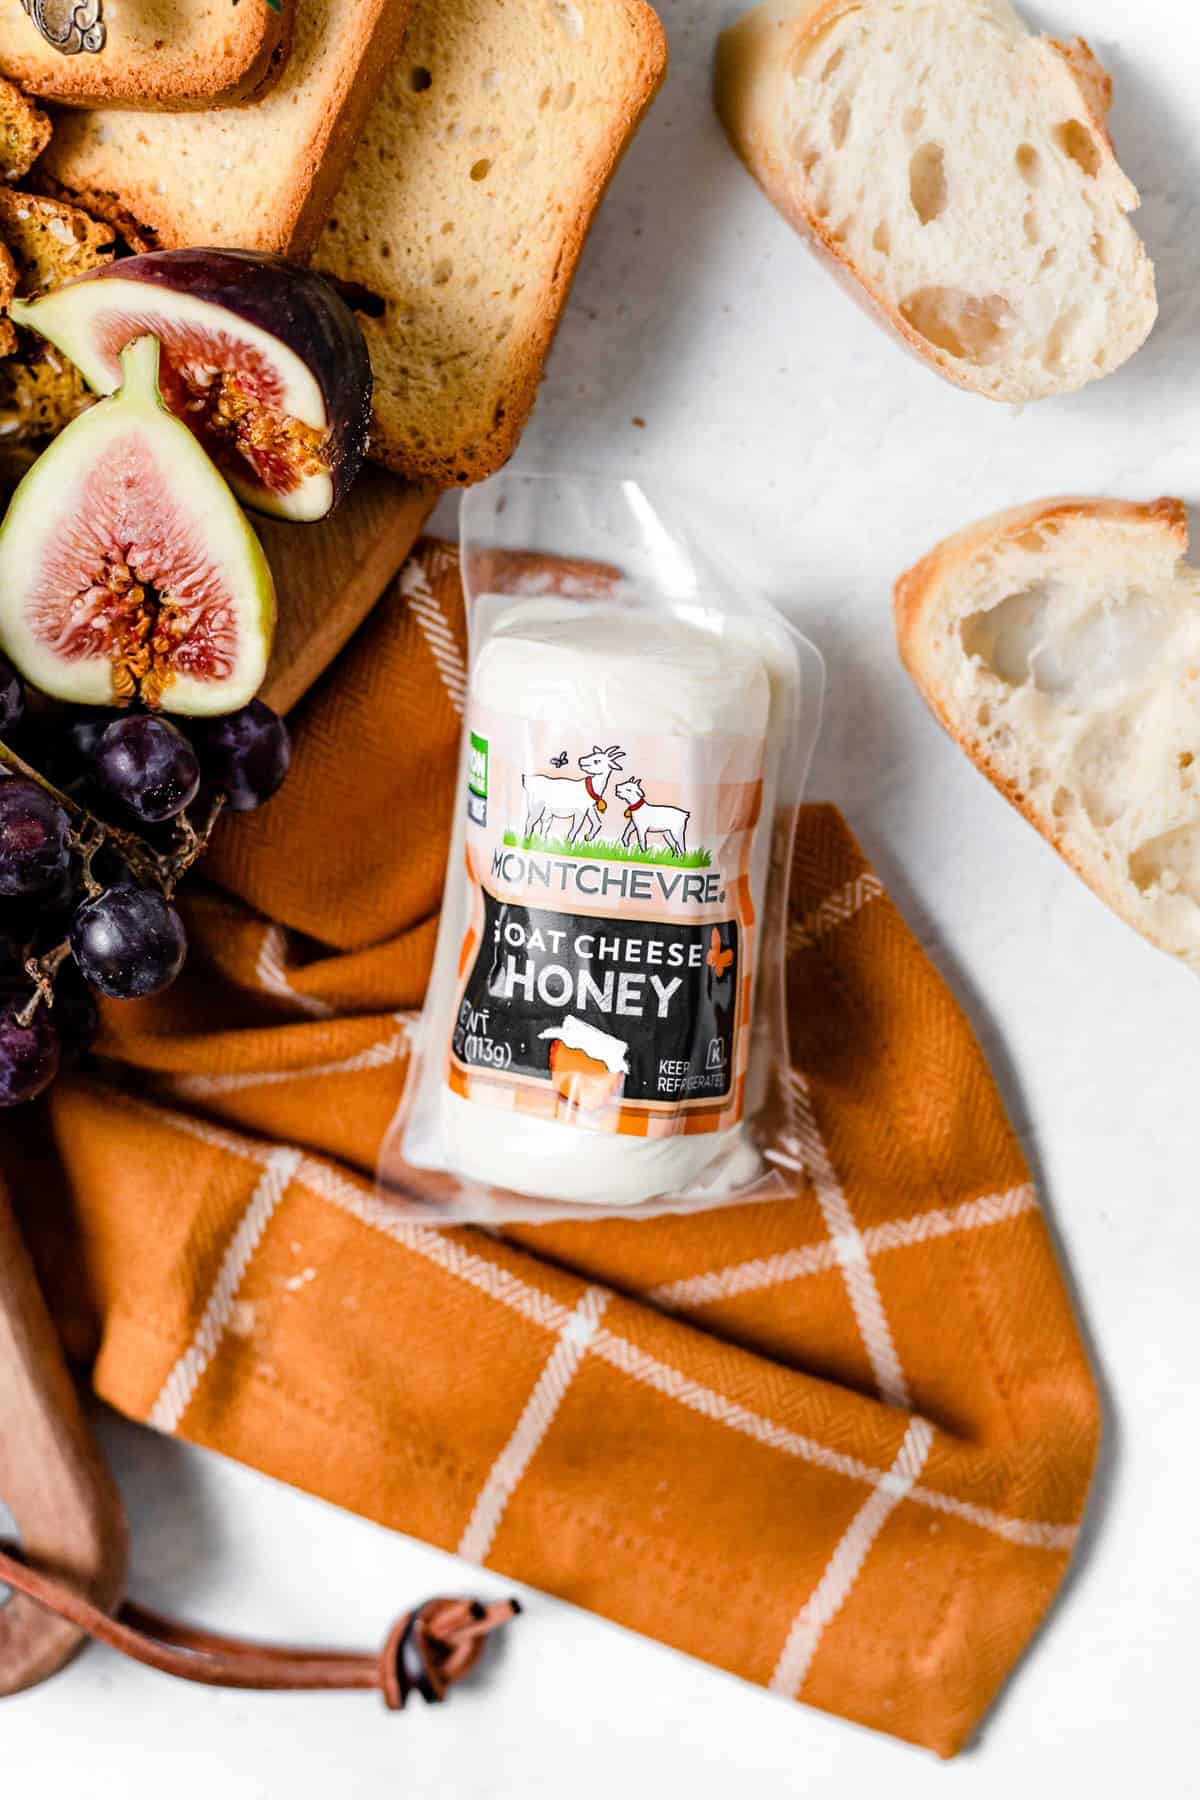
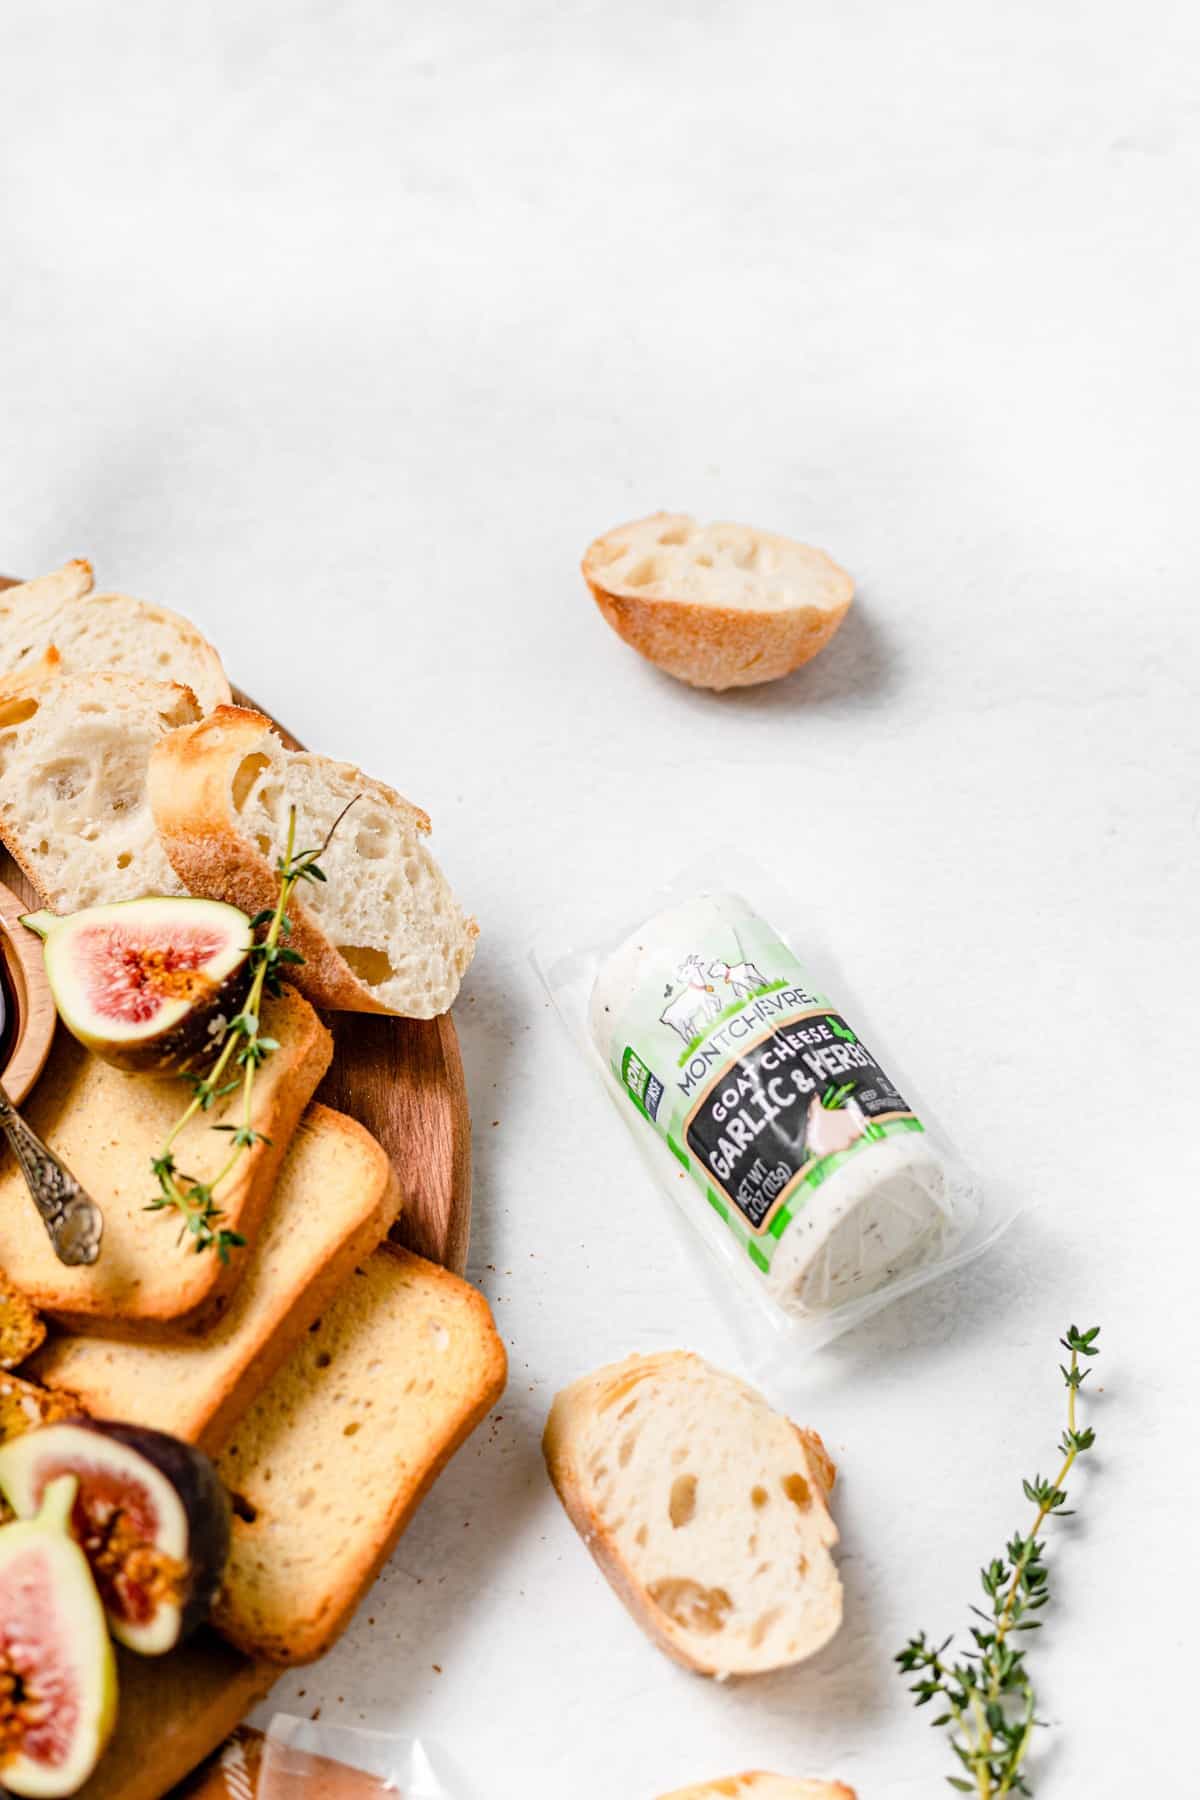
- Goat Cheese: High-quality cheese is key here. After all, it is the star of the show! When it comes to goat cheese, I love Montchevre® Flavored Goat Cheese Logs. They are made from fresh, non-GMO quality milk and come in 12 unique flavors—each one of them perfect for a specific time of the year! For this Harvest Cheese Board, I used the Montchevre® Honey Goat Cheese Log and the Montchevre® Garlic & Herb Goat Cheese Log.

- Meats: Charcuterie is essential on my cheese plates! I used salami, capocollo, and prosciutto here.
- Bread & Crackers: Choose a few different varieties of shapes and textures as vehicles for the cheese. I always include a crusty bread and a few types of crackers. If you or any of your guests are gluten free, use a gluten-free option as well!
- Fruit: Use whatever fruit is in season. Since it is still early fall, I used grapes, blackberries, and figs. Other great options are apples, pears, and pomegranate seeds.
- Nuts: It’s great to add some roasted nuts to the cheese board for crunch! I love truffle marcona almonds, but any type of nut works here—walnuts, cashews, pistachios, macadamia nuts…
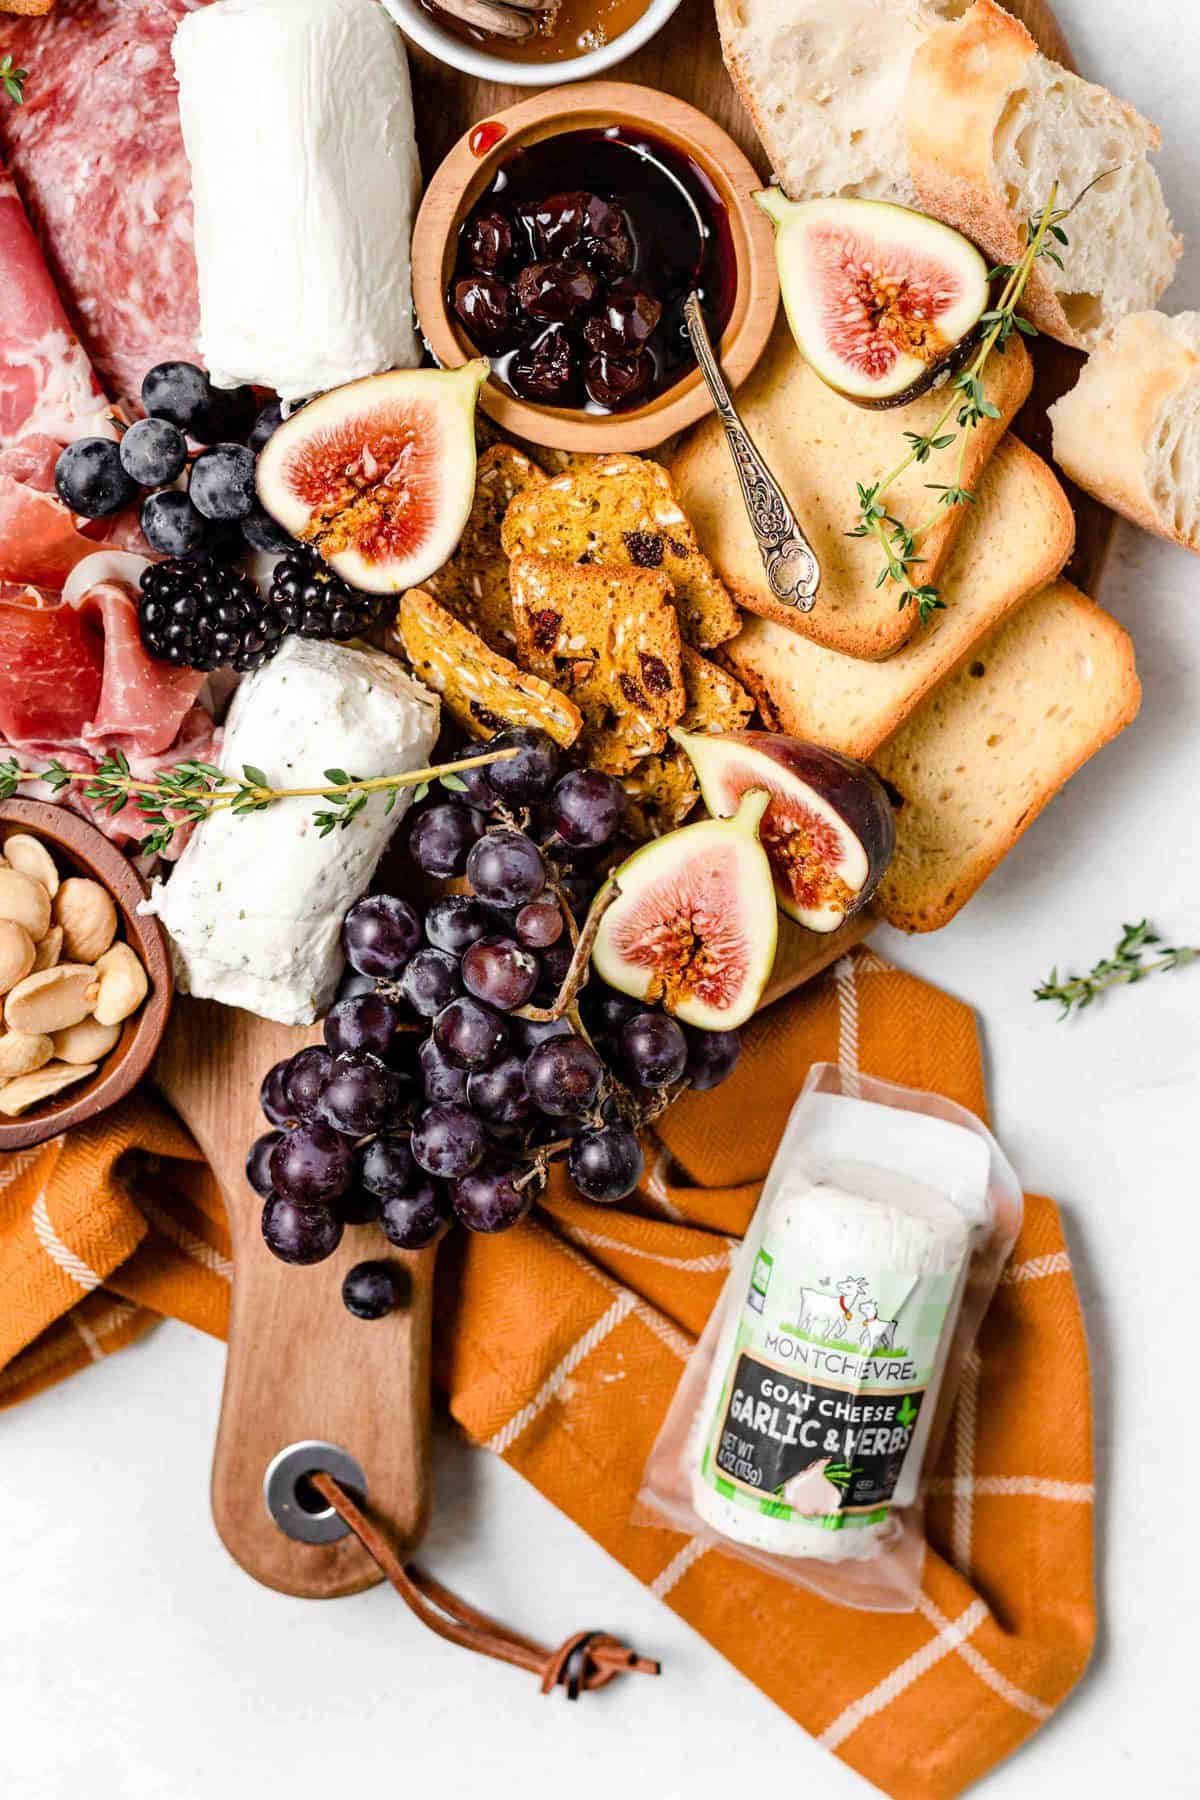
- Sweet Spreads: I like to balance out the salty and savory flavors with sweet spreads like jams, preserves, and honey. For this board, I used honey and tart cherry preserves, but apple or pumpkin butter would also make a great addition!
HOW TO ASSEMBLE THE PERFECT FALL HARVEST CHEESE BOARD
Cheese plates can look very intimidating and fancy, but they are actually so easy to assemble! I will walk you through all of the steps to make sure your cheese board turns out picture perfect!
STEP 1: PLACE YOUR LARGER ITEMS FIRST
When it comes to cheese platters, always begin by arranging the larger items like Montchevre® Goat Cheeses and bowls first. Add your spreads and small loose items like almonds to the bowls.
STEP 2: ARRANGE BREAD AND CRACKERS
Arrange slices of crusty french baguette and a few varieties of crackers around the board. Try not to go overboard with bread and crackers on the board. You can always add a separate plate for bread on your table or simply add more as your guests are eating.
STEP 3: ADD THE CHARCUTERIE
The meats go next. I like to fold the meats different ways for visual contrast.
STEP 4: ADD LARGER FRUITS
Now it’s time to add your fruit. Add bunches of grapes, sliced figs, apple or pear slices. By this time, your board should be looking pretty full!
STEP 5: FILL IN GAPS WITH SMALLER ITEMS
Finally, fill in all of the gaps with smaller items like dried fruit, nuts, berries, and loose grapes.

STEP 6: ADD A POP OF GREEN
Use a few sprigs of fresh thyme or rosemary to add a pop of color to the board.
STEP 7: ENJOY YOUR CHEESE BOARD!
Get together with your friends and family, open a bottle of wine, and enjoy your cheese board!
Build your own virtual cheeseboard for a chance to win instantly at www.montchevrebyocb.com.

How to Assemble the Perfect Fall Harvest Cheese Board
Ingredients
- 4 oz Montchevre® Natural Goat Cheese Log
- 4 oz Montchevre® Honey Goat Cheese Log
- Baguette slices
- Assortment of crackers
- Variety of fruits: grapes blackberries, figs, dried figs, apples, pears, pomegranate, dates, etc.
- Cured meats: salami prosciutto, capocollo, etc.
- Jam preserves, or honey
- Roasted nuts
- A few sprigs of fresh thyme or rosemary
Instructions
- Begin by placing cheeses and any items that require bowls around the board.
- Arrange sliced bread and crackers near the cheese.
- Place cured meats on the board next.
- Add larger fruits like bunches of grapes and sliced figs.
- Fill in empty spaces with smaller fruits like berries and dried fruit.
- Add a few sprigs of herbs for a pop of color and serve!